In this article I’ll take you through the process of Toyota Corolla headlight replacement, using a 2005 E120 Toyota Corolla 1.4 D4-D as an example. Someone reversed into this car in a car park and cracked the headlight in the process. Obviously they didn’t do the decent thing and leave their contact details! The headlight crack was letting in water and in time this would mean damage to the light and an MOT fail. For readers outside the UK, MOT stands for Ministry of Transport and is a roadworthiness inspection that all cars over 3 years old have to pass every year.

Tools I used for Toyota Corolla headlight replacement
- Phillips screwdriver or screwdriver bits and a bit driver ratchet. If you’re in the market for some decent driver bits, Wera are excellent. This is the set I have but there are many others.
- Plastic trim tools.
- 8mm and 10mm 6 point 1/4 inch drive sockets, ratchet and extension.
- Head torch and handheld torch.
- Jack and axle stands (not essential but made the job easier).
Removing the old headlight
The Toyota Corolla headlight replacement journey needs quite a bit of work elsewhere before you can get on to the headlight itself. This is because the bumper prevents access to the 3rd screw holding the headlight in place and also stops it sliding forwards.
Remove the upper radiator cover
This is held in by 4 plastic trim clips and 2 Phillips head screws (in the middle of the bonnet bumpers / dampers). Some of the trim clips will almost certainly break so it might be a good idea to have some new ones available. Check out the links later in this article.
Be careful with the screws as they may well be rusted in place. I used a bit driver ratchet with a small extension so I could apply more downward force when undoing these, to reduce the risk of the driver bit camming out and chewing the screw head.
Remove the front bumper
Remove clips behind the grille
Removing the upper radiator cover will reveal 3 more plastic clips holding the top of the bumper in place. These need to come out. I used my plastic trim tools to remove these, in an attempt to be as gentle as possible. With these removed, the grille part of the bumper should now be loose.
It’s then a case of working round the entire edge of the bumper and removing any screws or clips that are holding it in place. I jacked front of the car up and put it on axle / jack stands for this bit. This isn’t strictly necessary but it means the front wheels drop down in the wheel arches and gives more space to work.
Remove bumper to undertray screws
I moved on to the screws holding the bumper to the undertray next. They are 10mm and there are 6 in total. Go easy if yours are anything like this car as some were quite rusty. It’s usually best to use 6 point sockets rather than 12 point for rusty screws / nuts like these.
Separate bumper from wheel arch liner
Next we move to the wheel arches and another of those plastic trim clips. The clip is in roughly the 11 o’clock position as you look at the wheel arch. With that clip removed, the wheel arch liner can be lifted up enough to reveal an 8mm screw holding the rear edge of the bumper to the wing.

Make sure you do the same on the other wheel arch!
Unclipping the front bumper
Now everything should be loose so you can gently unclip the front bumper from its mounting points under the wings.
Most of the weight of the bumper is taken by the mounting brackets underneath each headlight. The headlights slide in to the same brackets.
Slide the bumper forwards away from the car and eventually it will come off. Don’t pull it too far, as the front fog / driving lights will still be attached. You should be able to hold the bumper with one hand and disconnect the lights with the other.
Now the bumper should be completely free and can be moved away from the car.
Remove the headlight
Ok, now you can actually get to the main event in your Toyota Corolla headlight replacement! There are 2 screws on the top of the light and one on the bottom outside corner, which should have been revealed by removing the bumper.

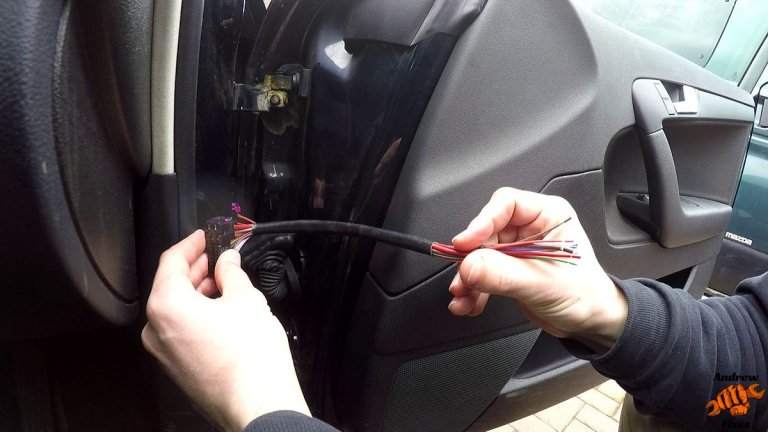
With these 3 screws removed, the headlight can be removed by just sliding it forwards. As with the bumper, don’t get too excited and pull it out too vigorously, because there are 2 electrical connectors to release.
With the smaller of the 2 connectors, there is a flat wire spring across the top. Just press this in towards the body of the connector and this will enable it to be disconnected.
The larger connector has a large red tab on one end. As the red tab is pulled outwards it will gradually release the connector from the headlight.

Fit the new headlight
I was fitting a used headlight, sourced from a vehicle dismantler on eBay. I wanted to check all the bulbs and the angle adjuster worked before putting everything back together.
I made the electrical connections and just put the headlight back in place with 1 screw so I could test it without fear of it falling on the floor. Everything worked, so time to put the other screws in and get the bumper back on.
Before tightening the headlight screws, make sure the gap between the headlight and the front wing is nice and even all round. You may also want to temporarily close the bonnet to check the gap there too.
Refitting the bumper
Hold the bumper close to the car and reconnect the front fog lights.
Line up the bumper with its mounting brackets underneath the headlights and slowly slide it back towards the car.
As well as breaking the headlight, the impact had also broken the plastic clip holding the bumper in place under the wing. I would have liked to replace this but there wasn’t time as the owner wanted their car back. I mention this as something to look out for if you’re also replacing your headlight following an impact.
With jobs like this where there are lots of fasteners to go back, I usually find it best to put all of them in loosely first, then tighten them up afterwards when I’ve got the alignment right.
To recap that’s 6 screws holding the bumper to the undertray and 1 screw each side holding the bumper to each wing. I put some grease on the undertray screws to try to minimise further corrosion.
I managed to get the bumper aligned OK around the broken clip, but it would have been easier and slightly more secure to fit a new clip.
After putting all the screws back, it’s time for the trim clips holding the grille and wheel arch liners in place.
If you need new clips the wheel arch liner clips are 7mm. The bumper clips are 8mm.
Refit the upper radiator cover
The last step is to refit the upper radiator cover with new trim clips if required, then your Toyota Corolla headlight replacement is complete.